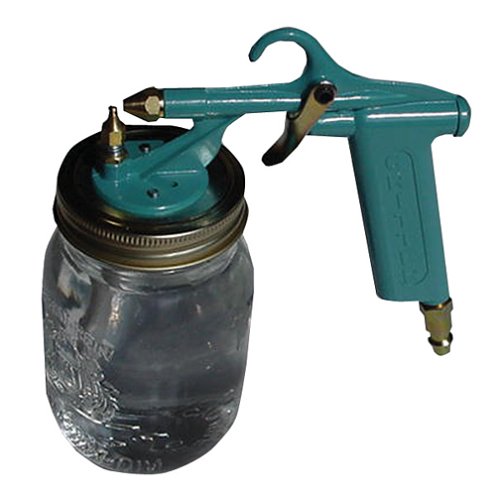
Critter Spray Products 22032 118SG Siphon Gun
- Compressor-mounted spray gun kit; requires 3 cfm at 90 psi
- Attaches to Mason jars filled with paints, stains, lacquers, and more
- Comes with glass Mason jar and metal spray gun
- Includes siphon gun, tube, 16-ounce Mason jar, jar gasket, and instructions; compressor not included (3/4-horsepower minimum)
- Fits standard 16-ounce Mason jar--easily adaptable to fit other jars
- Requires minimum 3/4 hp compressor.


Jody Carney
Surprisingly, a Top Notch Spray Gun
Bought this little gun to spray some kitchen cabinets with oil based paint and am now a true devotee of this little green critter. The finish was superb, no drips, no runs, and no orange peel. The quality of the paint job ranks up there with professional results. I wasn't shocked, I was amazed, and best of all clean up is a breeze. I now choose this little gun over my other HVLP sprayers for most small jobs. For spraying oil based paint, this is the method I used: - Adjust the spray tip as per the instruction manual - Thin your paint by about 10% using mineral spirits. We also generally add a couple drops of Japan Dryer - pour your paint through a paint strainer into the mason jar - Set your compressor to deliver about 25 lbs pressure as a starting point (this gun doesn't take much) - Put on your breathing gear (seriously, don't spray paint without a proper mask on) - Start spraying onto a scrap piece of wood or cardboard to make fine adjustments If the coverage seems a bit sparse, then slowly increase the pressure to the sprayer a pound a tiny bit at a time. 28-30 lb is where we usually end up. Much more than that and your paint has a good chance of having an orange peel appearance. If you get it right, which really is not all that difficult to do, you should have a glass smooth finish. Things to not do: - Do not try to do the job in one coat. It will not work and your end result will be crappy. Anticipate three coats if using oil based paint. - Hang or set whatever you are painting in a relatively dust free location to dry as wet paint can be a dust magnet. - Spray in even strokes starting and ending off the edges of the object you are painting. Never START the spray with the sprayer pointing directly at the object you are painting. - Change spray directions from coat-to-coat (ie up/down, left/right, corner/corner) as that insures good coverage. Clean up is simple. Have a second mason jar with some mineral spirits in it, attach it to the sprayer and spray into a cardboard box until it's clear of paint (about 6 or 7 short bursts), then take a paper towel with a little mineral spirits on it and wipe the brass parts of the sprayer down to get any paint off. It doesn't get any simpler than that. Takes painting from a chore to fun...almost. We've uploaded a picture of one of our custom bathroom wall cabinets that was painted using this critter sprayer so you can get an idea of the finish quality.
Rhonda Brown
It's love
This is my first foray into paint spraying and I love it! I found this on Little Green Notebook, and read a bunch of other blog posts and reviews before committing. I used it to paint my kitchen cabinets with chalk paint - yes, you can spray chalk paint! Just be sure to water it down (2:1, paint:water) and strain it. It works like a dream. It will occasionally clog, but it's such a simple piece of machinery that you just rinse it out and it works fine. Yes, it's small, yes it's not that powerful, but I'm not a professional (DIY ftw) and for my projects it's been great. The finish is so lovely and it's so much easier than painting and sanding. I highly recommend.
Anthony Armstrong
Game Changer!
Bought this sprayer with the intention of painting kitchen cabinets because I wanted a smooth finish I knew I could never get from a brush; the results were so good I ended up using this to paint two vanities, 19 doors and a lot of trim as well and with proper care I've never needed to buy the maintenance kit. My boyfriends' mother paid a professional to paint her cabinets (with a brush) at the same time and mine easily looks 5 x better and cost about $2k less. I can get a coat of paint on 15 full-size doors in about 2 hours. There is a little bit of a learning curve but doing a little research before you work helps tremendously. There is overspray but dropcloths and plastic sheeting can easily help contain the mess. My primer has not sprayed as well as the paint but you should lightly sand between your final coat of primer and first coat of paint anyways. I used floetrol as an additive which I believe also helped the paint flow better. Make sure to strain your paint well before use and you should rarely have clogs and lesson learned, don't pre-fill a bunch of mason jars if you won't be using them for more than a day if using latex paint, its prone to curdling around the rim and lid of the jar and will just lead to clogs. Buy a separate bucket to mix your paint with your additive and strain and fill as you go.
Tracey Hulsey-Sykes
The absolute best new tool in my arsenal
This product is awesome. There are some things required to have a good result. I read all of the questions and answers, and most of the reviews. Listed below is a summary of what turned out to be most important. I used latex semi gloss paint. It is crucial that the paint be thinned. I used 60% paint, 20% Floral, and 20% water. The final liquid needs to be the consistency of maple syrup. The next crucial thing is to strain the paint, even if it is brand new. Also have a small guage wire, or sewing pin with a big head handy. You will want to poke the pin/wire into the paint nozzle periodically, and put it in whenever you need to let things dry between coats so that the paint won't clog the nozzle. I was able to work for 4 hours without cleaning up the equipment. I found that 60 to 70 psi was the sweet spot for me. Be sure to sweep across your project so that the paint spray stops off of your material. Keep your Critter about 6" from surface and move pretty slowly. A final tip is that all of the coats of paint should be pretty thin. The first coat should end up looking like it has very little paint color. The natural reaction is to keep spraying. DON'T or you will create drips and runs. The next coats will provide the coverage. I did 4 coats on a trimmed out louan closet door. In between coats, I lightly sanded with 330 grit followed by a tack cloth. My final result has no runs, drips, or brush marks. Total time spread out with drying time was maybe 10% of what it would have taken with a brush. At 85% outside I recoated every 30 minutes. So happy to finally have an inexpensive product exceed all expectations.
Susila Silwal
Best budget sprayer on the market!
This has got to be the best 42 dollars I've spent on Amazon. I was able to do all my kitchen cabinets during my remodel with just this product. Literally professional level results. Couple of tips: use Benjamin Moore advanced paint. Superior leveling properties and You will not need any dilutant if you use this paint. I was even able to use 123 bullseye primer with some floetrol and it worked great. Just have to play around with the ratio. Use slow sweeping overlapping strokes keeping care to stay approx 6 to 8 inches from your surface. I used a porter cable pancake compressor and it worked fine even though the specs weren't exact. Kept it around 70 to 80 psi with BM paint. It will vary depending on type of paint. General rule of thumb is higher pressure with higher viscosity paint. Listen to how it sounds coming out and adjust accordingly. Make sure the Venturi nozzle is exactly in the middle of the air outlet or it will not come out properly. Make sure you clean it out Everytime you use it paying special attention to nozzle tip. Clean up is a breeze! Also I used a oil/water catch before the sprayer so anything coming from the compressor wouldn't contaminate my project. I took tips from others and used a fine filter to filter paint before you put it in Mason jar. Didn't ever try it straight out of the paint jar, but I'd take most people's advise on this one. You'll never paint anything by hand after you use this product. Also very little waste/overspray. Make sure you fill multiple Mason jars if you plan on using a lot, but you'll be surprised how far a little paint goes with this thing. The only con I could think of is that it is a pretty narrow cone shaped spray pattern, which gives you good control but can take a while if you are painting something really big. I have sprayed a door and it definitely takes less time than by hand at least. If you're on the fence...Buy this thing!
Andrew Webster
Makes me look like I know what I am doing
0:00 0:00 This video is not intended for all audiences. What date were you born? JanuaryFebruaryMarchAprilMayJuneJulyAugustSeptemberOctoberNovemberDecember12345678910111213141516171819202122232425262728293031201920182017201620152014201320122011201020092008200720062005200420032002200120001999199819971996199519941993199219911990198919881987198619851984198319821981198019791978197719761975197419731972197119701969196819671966196519641963196219611960195919581957195619551954195319521951195019491948194719461945194419431942194119401939193819371936193519341933193219311930192919281927192619251924192319221921192019191918191719161915191419131912191119101909190819071906190519041903190219011900 Submit Adobe Flash Player is required to watch this video. Install Flash Player I bought this a couple years ago and it say in the box til a few months ago. All those projects I planned kept getting put off. I finally got around to painting a vintage campaign dresser and am amazed how easy it is to use. I use General Finishes Milk Paint in Coastal Blue and the coverage this little gun provided is nothing short of amazing. Cleaning is a breeze, I have a large mason jar with water and a few shakes and sprays has everything clean. I can set up several jars ahead of time so I am not stopping to refill and stopping is a breeze, I leave the paint in the jar, put a lid on and it's ready to go for the next time. Swapping from paint to poly (I use Polycrylic) is super easy. First two (video & photo) are of my current project, third pic is the Campaign Dresser I painted last fall. Seriously, buy this!!
Marcia Libosada
Very Happy!
0:00 0:00 This video is not intended for all audiences. What date were you born? JanuaryFebruaryMarchAprilMayJuneJulyAugustSeptemberOctoberNovemberDecember12345678910111213141516171819202122232425262728293031201920182017201620152014201320122011201020092008200720062005200420032002200120001999199819971996199519941993199219911990198919881987198619851984198319821981198019791978197719761975197419731972197119701969196819671966196519641963196219611960195919581957195619551954195319521951195019491948194719461945194419431942194119401939193819371936193519341933193219311930192919281927192619251924192319221921192019191918191719161915191419131912191119101909190819071906190519041903190219011900 Submit Adobe Flash Player is required to watch this video. Install Flash Player Love this little thing! It doesn’t look like much from the pictures but it’s all metal and well built. I love how easy it is to clean! I love that it uses mason jars - will make it super easy to store and use my finishes. In the video I have the compressor at 90 PSI to test with water. For my clear water-based topcoat (thinned 15% with water) - I liked how it sprayed best at 50 PSI. The only adjustments you can make on it is the pressure from the compressor and how high the nozzle (where the paint siphons out) is set into the air stream. It doesn’t have any needles, therefor you can’t adjust the pattern of the spray. This sprayer is basically a spray can on steroids (about the same spray diameter). I upgraded mine slightly but buying a rubber gasket from hardware store (had to cut the outside edge to size) and got a small piece of 3/8” tubing so it would reach further into the jar for when finish gets low.
Nancey Ali
Beautiful finish
Definately a learning curve, but I'm not a quiter. Here is what I learned. You must add about 20% water/Flotrol to thin. Didn't need to be too exact. I kept a sewing needle on hand to unclog the tip if the paint was building up. Once the paint was strained, I had NO issues with clogging other than build up from spraying (I used latex paint). At one point I could get nothing to come out even after recleaning.....ughhh, found out that the paint nozzle needed to be closer to the air nozzle to create more suction. Almost everytime I couldn't get the paint out it was a nozzle adjustment. I can see why the cleaning kit would be good but I didn't buy it yet. I used a rubber canning gasket (just cut off the tab on the side) saved $$$ and hassles of changing out, just make sure it's centered and pushed in or it will leak. I strained large amount of paint in bigger jars then mixed in sprayer as needed. My furniture turned out great.
Catherine Johnson Haligah
Works great--will absolutely need to buy a few more items
I am an avid DIYer and I really wanted a spray gun so I can have a professional look on my painted products. This spray gun had great reviews and fit my budget (assuming you already have the compressor), so I got it. I am not disappointed. It may be small, but it works great, and the ability to attach to mason jars has come in great handy. Here are some helpful tips that can get you painting asap. After you buy this, head immediately to the nearest hardware/big box store and pick up floetrol (to thin out latex paint), paint thinner, an quart sized bucket, extra mason jars and a mesh paint strainer. (Originally, I bought the floetrol only and sure enough, after about 30 minutes of use the gun was clogged with particles and the spray stream was so small that it wasn't worth my time. Oops. Headed back to the store the next day to get the strainer and after 2 hours of constant use today, there have been no clogs at all). Mix your paint and the floetrol in the quart sized bucket so you have a easy refill when the attached mason jar runs out (after about 15 minutes of constant use for me). When you are done, rinse the paint off the gasket and the metal tube, then take an extra mason jar, fill it with 1/4 full with paint thinner. and run the gun with paint thinner to clean out the interior. I painted an entire wall of my garage with this gun. It was a nightmare with a brush and roller, but this little spray gun was able to get into the crevices and give me a smooth look. I have the nicest looking garage in the neighborhood now. :)
Susan K Linton
Makes spraying much more enjoyable
This Critter Spray Gun has been a pleasant surprise. It's a fun tool to use, which says a lot. Spray projects are something I tend to dread, so having a tool that makes it less stressful is very important to me. With this review, I am comparing the Critter to the HomeRight C800766 Finish Max Fine Finish Sprayer. I was underwhelmed by the Home Right product, but the Critter Gun has exceeded my expectations. I have learned that paint spraying really is an art, and also that it takes patience. The quality of my painted projects with the Critter is good, but it's not professional, by any means. For instance, the vanity and cabinet drawers that I sprayed look good, but they are far from flawless. To get a flawless finish, it's important to sand betweens coats, and also do quick passes -- rather than trying to get really full coverage on each coat (because that leads to clumps and/or drips). What do you need to get started using the Critter Gun? - air compressor. If you do not have an air compressor already, and you plan on doing a lot of DIY work around your house, then I believe an air compressor is a wise investment. You can buy a cheap, tiny one from somewhere like Harbor Freight, or you can buy a compressor combo kit (which would include a nail gun and a staple gun) from Home Depot (that's what I did a couple years ago; I have felt it was a worthwhile investment). - 1/4" coupler kit. This should cost you $5 or $6 at your local home improvement store. - buy a box of basic Mason Jars from Wal-Mart or Fleet Farm. The 12 jars I bought at Wal-Mart cost about $8. To save time for a large painting project, you can fill up several Mason Jars at once -- then you can shift out an empty Mason Jar to a fresh one mid-project, as needed. Pros (vs. Home Right Sprayer): - setup and cleanup are faster and easier with the Critter. - more consistent output of paint. This is a big one. With my Home Right sprayer, I was constantly getting derailed by paint clogging in the unit (even after diluting and straining the paint). - the Critter is slightly cheaper (assuming you already have an air compressor). - the Critter has far less issues with paint dripping on the project. Cons (vs. Home Right) - the Critter does not allow you to cover as much ground as quickly as the Home Right (and other sprayers, such as Wagner). While the paint spray is consistent, it is a small stream of paint. So, you need more passes per project. Tips: - others have commented about the flimsy gasket that comes with the Critter, but I have not had any issues with the gasket (after about 10 uses of the gun). I have been careful with the gasket, so as not to rip it. - do strain your paint first. You can buy a cheap strainer at Home Depot or any paint store. Ideally, choose one that has an elastic band that would hold the strainer in place on top of the Mason Jars. - I have used the Critter with both oil-based primer, latex-based primer, and latex paint. The latex paint goes on slick and easy, because it is thinner than primer. The oil-based primer was the toughest of the three liquids I have used. It did leave minor bumps on the project, but that might have been user error on my part. - use Floetrol (sold at all big box home improvement stores) to thin out latex-based paint. - use Penetrol (same maker as Floetrol) to thin out oil-based paint. These paint additives help the paint/primer go on more smoothly. - I have experimented with different PSI (pressure) settings on my air compressor. I have used anywhere from 30-90 PSI. The thicker the paint/primer you are applying, the more pressure you need (in my experience). Just test out different pressure levels on cardboard or paper that you have laid down for the project. - ideally, have your subject pieces laid flat down on the ground, rather than vertical against a wall. This helps you avoid drips. - great lighting really helps. Ideally, utilize shop lights above you. This helps you see where you have already sprayed vs. what else on the project needs to be sprayed. - I have been doing two coats of primer and one or two coats of the finish paint color.